How to Create a DIY Easter Journal with Printable Stickers
Easter is the perfect time to start a new creative project!
Whether you love journaling, scrapbooking, or simply want a fun way to document the season, an Easter-themed journal is a great way to capture special memories, reflections, and traditions.
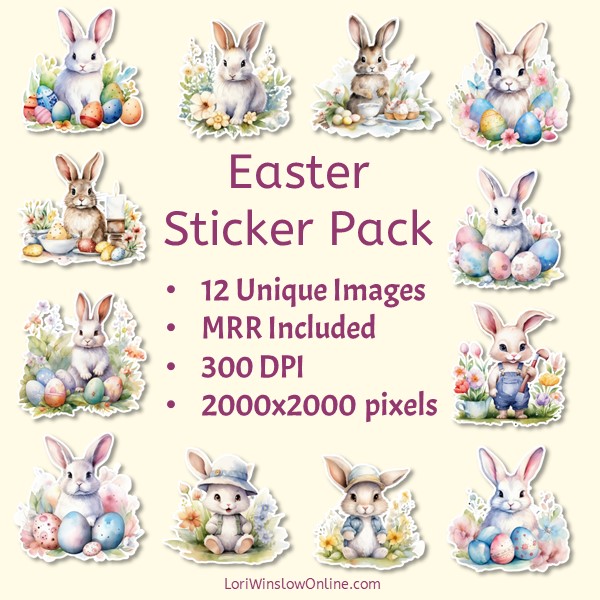
The best part? You don’t need to be an artist to create a beautiful Easter journal! With my printable watercolor Easter stickers, you can easily decorate your pages with adorable bunny illustrations, colorful eggs, and floral accents. These stickers make journaling effortless and fun—just print, cut, and stick!
This step by step guide will help you to create your own DIY Easter journal, whether you’re using it for daily reflections, memory-keeping, faith journaling, or planning your Easter festivities. Grab your favorite notebook, some stickers, and let’s get started!
Gather Your Supplies
To create your DIY Easter journal, you’ll need a few basic supplies. The great thing about this project is that you can customize it to fit your personal style, using whatever materials you already have on hand. Here’s a list of suggested items – and alternatives:
1. A Notebook or Journal
Choose a journal that suits your needs and creative style:
- Blank journal or sketchbook – Perfect for freeform journaling, doodling, and sticker collages.
- Lined notebook – Great for those who prefer structured writing, like gratitude journaling or reflection entries. (This is my choice – I like to write.)
- Bullet journal – Ideal for creating themed layouts, trackers, and habit logs.
- Printable journal pages – If you prefer a custom layout, you can print pages and bind them yourself.
2. Printable Easter Stickers
Stickers bring your journal to life with vibrant colors and festive designs. My watercolor-style Easter stickers featuring adorable bunnies, pastel eggs, and spring flowers to add charm to your pages. If you don’t have printable stickers yet, you can grab a set from my shop! You can also use any stickers you already have at home.
3. Pens, Markers, and Highlighters
A set of colorful pens or markers will help add variety to your journal:
- Gel pens or fine-tip markers – Perfect for writing, doodling, or outlining stickers.
- Pastel highlighters – Great for creating soft, Easter-themed accents.
- Metallic or white gel pens – Fun for adding small highlights and details.
4. Scissors or a Cutting Machine
If you’re using printable stickers, you’ll need a way to cut them out:
- Scissors – A simple option if you’re cutting by hand.
- Paper trimmer – Useful for cutting straight edges.
- Cutting machine (Cricut or Silhouette) – A great tool for precision-cut stickers if you prefer a more professional look.
5. Sticker Paper or Glue
- Sticker paper – If you want easy-to-peel stickers, print them directly on sticker paper.
- Regular paper + glue stick or double-sided tape – If you don’t have sticker paper, this is a great alternative.
6. Optional Embellishments
To take your journal to the next level, consider adding:
- Washi tape – Decorative tape that can create fun borders or page dividers.
- Scrapbook paper – Great for layering behind stickers to add depth and texture.
- Pressed flowers or paper cutouts – A creative way to add a touch of nature to your pages.
Here’s some detailed instructions to help you print and cut out your printable stickers.
Print and Cut Your Stickers
Now that you have your journal and supplies ready, it’s time to prepare your printable Easter stickers! Whether you’re using a printer at home or sending them to a local print shop, these simple steps will ensure your stickers come out looking vibrant and professional.
1. Choose Your Sticker Paper
If you’re printing at home, selecting the right sticker paper can make a big difference in the final result. Here are your options:
- Matte sticker paper – Best for a soft, natural look that blends well with journal pages.
- Glossy sticker paper – Gives a shiny, vibrant finish, making the colors pop.
- Clear sticker paper – Perfect for a sleek, transparent look, especially if you want to layer stickers over text.
If you don’t have sticker paper, you can print on regular paper and attach your stickers with a glue stick or double-sided tape.
💡 Pro Tip: Clear vinyl sticker paper can also be a great choice if you are cutting by hand and not great at fussy cutting – plus they are more durable.
2. Print Your Stickers
- Use a high-quality setting on your printer for the best color results.
- Ensure your printer is set to ‘Actual Size’ or ‘100% Scale’ to keep stickers at their intended dimensions – unless you want to make them smaller.
- If printing on sticker paper, let the ink dry fully before handling to prevent smudging.
💡 Pro Tip: Print a test page on regular paper first to check colors and sizing before using sticker paper.
Now that you have your journal and supplies ready, it’s time to prepa
3. Cut Your Stickers
Once your stickers are printed, it’s time to cut them out! There are a few different methods you can use:
✂️ Cutting by Hand (Easy & Budget-Friendly)
- Use sharp scissors to carefully cut around each sticker, leaving a small white border for a classic sticker look.
- If you want precision, try craft knives or detail scissors for intricate designs.
📏 Using a Paper Trimmer (For Straight Cuts)
- A paper trimmer is great if your stickers are designed in straight rows, making cutting quick and clean.
🖥️ Using a Cutting Machine (For Perfect Edges)
- If you have a Cricut, Silhouette, or another cutting machine, you can upload the sticker file and set it to ‘Print then Cut’ mode.
- This ensures perfectly shaped stickers with little effort.
📦 Using Pre-Cut Sticker Paper (Fast & Convenient)
- Pre-cut sticker sheets with circles, squares, or other shapes allow you to print directly onto them without the need for cutting.
- These are a great option if you want uniform stickers and a quick, no-fuss solution.
- Just make sure your sticker design aligns with the pre-cut shapes before printing!
4. Store Your Stickers for Easy Use
- Keep cut stickers in a small envelope or plastic pouch so they’re easy to access.
- If you’re using uncut sticker sheets, store them in a folder to keep them flat and protected.
With your stickers now ready, you can start decorating your Easter journal!
Bringing Your Easter Journal to Life
Now that your journal is set up and your stickers are ready, it’s time to start using it throughout the Easter season! Whether you’re capturing special memories, reflecting on the meaning of Easter, or simply enjoying a creative outlet, your journal can become a cherished keepsake that you’ll love looking back on.
How to Use Your Easter Journal Daily
Here are a few ways to make your journal a meaningful part of your Easter celebrations:
- Daily Gratitude Entries – Each day, write down something you’re grateful for and decorate the page with Easter stickers.
- Easter Memory-Keeping – Record fun family traditions, egg hunts, or holiday meals and add stickers to highlight special moments.
- Seasonal Reflections – Use your journal as a space for self-reflection, spring goal-setting, or even faith-based devotionals.
- Creative Journaling – Mix writing with doodles, sticker collages, or even small mementos like ticket stubs from Easter events.
- Countdown to Easter – Create a simple countdown, marking off the days until Easter Sunday with stickers and fun prompts.
Your printable watercolor stickers are a perfect way to add a festive touch to every page. They make journaling feel more fun and visually appealing while keeping the focus on creativity, joy, and reflection.
Final Thoughts & Next Steps
Creating a DIY Easter journal is a simple yet rewarding way to celebrate the season in a personal and artistic way. With just a few supplies and printable stickers, you can turn an ordinary notebook into a beautiful journal filled with memories, thoughts, and creative expression.
💡 Want to get started? Grab my printable Easter sticker set here!
I’d love to see what you create! If you make an Easter journal using printable stickers, share your pages on social media and tag me – I can’t wait to see your creativity in action!
Happy journaling, and have a wonderful Easter season! 🐰🌸